Ever wonder why some floor coatings look flawless for years while others fail within months? More often than not, the secret lies beneath the surface – in the concrete preparation. Cutting corners here is like building a house on sand; it might look good initially, but it won't last.
Why Concrete Prep Matters (More Than You Think)
The truth is, even the highest quality epoxy, polyaspartic, or polyurea coatings are only as good as the foundation they're applied to. Concrete isn't always as pristine as it looks. It can contain contaminants like oil, grease, dust, or even remnants of previous coatings. These impurities prevent proper adhesion, leading to delamination, bubbling, and premature failure. Think of it like painting over a greasy surface – the paint just won't stick.
Beyond contaminants, the concrete's profile is critical. Coatings need a slightly rough surface to mechanically bond. Without it, the coating is essentially just sitting on top of the concrete, vulnerable to peeling and wear. This profile is often referred to as Concrete Surface Profile, or CSP for short. The International Concrete Repair Institute (ICRI) has created a set of standards to help you determine the correct CSP for your coating system. Aim for the profile recommended by your coating manufacturer for optimal results.
Essential Prep Steps: A Contractor's Checklist
Before you even think about mixing your coating, run through these crucial steps:
- Surface Cleaning: Start with a thorough cleaning to remove any loose debris, dirt, and surface contaminants. This might involve sweeping, vacuuming, or even pressure washing, depending on the condition of the concrete. For oil or grease stains, use a concrete degreaser like Grout Shield Grease & Oil Stain Remover following the manufacturer's instructions. Don't underestimate the power of a good scrub!
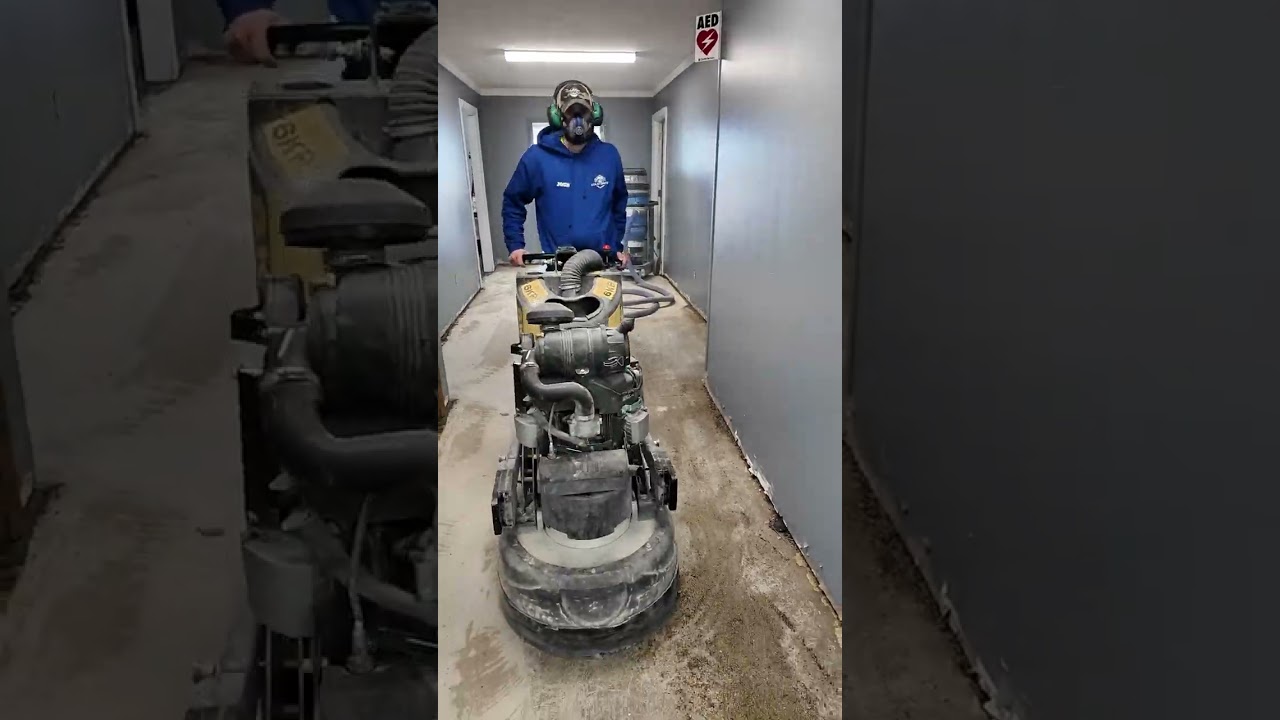
- Grinding or Shot Blasting: This step is crucial for achieving the correct CSP. Grinding with diamond tooling or shot blasting creates the necessary texture for the coating to adhere properly. The specific tooling or shot size will depend on the existing concrete condition and the desired CSP. For epoxy coatings, a CSP of 2-3 is generally recommended, while polyaspartics might require a CSP of 3-4. Pay attention to the edges and corners – these are often overlooked but are just as important.
- Acid Etching (Use with Caution): In some cases, acid etching can be used to further prepare the concrete surface. However, it's essential to use this method with extreme caution, as improper application can damage the concrete and create new problems. Always follow the manufacturer's instructions carefully, and ensure thorough rinsing and neutralization after etching. Acid etching should only be used if grinding or shot blasting is not possible.
- Moisture Testing: Concrete is porous and can hold moisture. Before applying any coating, it's critical to test the moisture content of the concrete using a moisture meter. Excessive moisture can lead to blistering and delamination of the coating. Most coatings require a moisture content below 4-5% for proper adhesion. If moisture levels are too high, you may need to apply a moisture vapor barrier before coating.
Tools of the Trade: Gear Up for Success
Having the right tools makes all the difference in concrete preparation. Here's a quick rundown of essential equipment:
- Concrete Grinder: Invest in a quality concrete grinder with variable speed and dust collection capabilities. A 7-inch or 10-inch grinder is suitable for smaller jobs, while larger projects may require a larger, walk-behind grinder.
- Shot Blaster: For large-scale projects or heavily contaminated surfaces, a shot blaster is a powerful tool for achieving a consistent CSP.
- Dust Collector: Dust control is crucial for both safety and quality. A HEPA-filtered dust collector is essential for minimizing airborne particles and ensuring a clean work environment. It also prevents dust from settling back onto the prepared surface.
- Moisture Meter: A reliable moisture meter is a must-have for assessing the moisture content of the concrete. Choose a meter that provides accurate readings and is easy to use.
Pro Tip: Always wear appropriate personal protective equipment (PPE), including a respirator, eye protection, and gloves, when working with concrete and coatings.
Common Mistakes to Avoid
Even with the best intentions, it's easy to make mistakes during concrete preparation. Here are a few common pitfalls to watch out for:
- Skipping Steps: Don't be tempted to cut corners by skipping essential prep steps. Each step plays a crucial role in ensuring the long-term performance of the coating.
- Ignoring Manufacturer's Instructions: Always follow the coating manufacturer's instructions for surface preparation, mixing, and application. These instructions are based on extensive testing and are designed to ensure optimal results.
- Applying Coatings to Wet Concrete: As mentioned earlier, moisture is the enemy of coatings. Never apply coatings to concrete that is wet or has excessive moisture content.
Concrete preparation might seem tedious, but it's the foundation of a successful floor coating project. By taking the time to do it right, you'll ensure a durable, long-lasting finish that will impress your clients and protect your reputation. It's an investment that pays off in the long run.